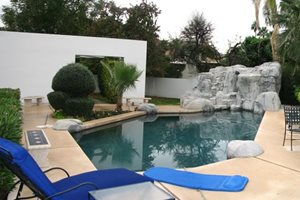
Backyards
 Front Yards
Pool Installation & Construction
A step-by-step overview of how a swimming pool is builtThe process of gunite pool construction is straight forward but grows more complex with specialty designs such as waterfalls and rock work. But even when it is complex, the basics remain the same, particularly when it comes to the pool shell itself and the standard mechanical equipment.
 This tiny pool with an L shaped glass tile wall fountain has coping and decking in place. The men are working on the cap which must include the fountain weir and fiber optic lighting.
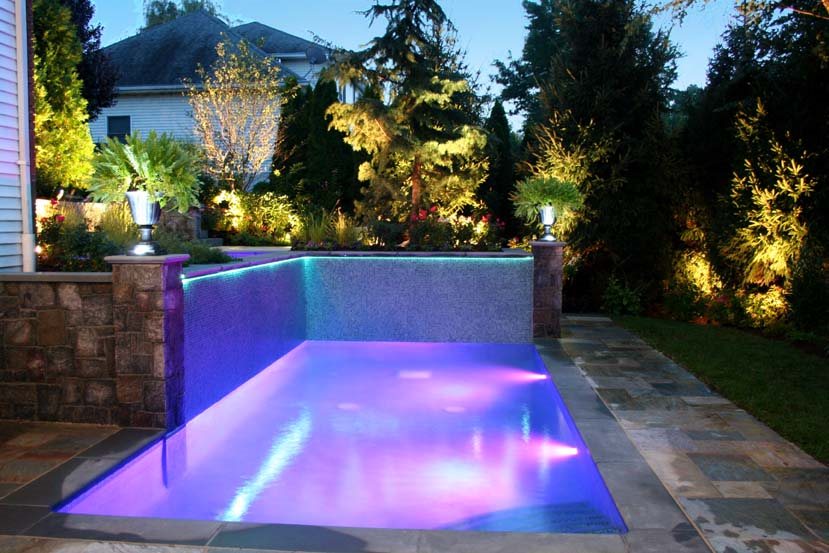 This is the finished view of the same pool showing its remarkable beauty after dark. This Cipriano Lansdcape Design pool illustrates this company's incredible skill at awesome lighting for even the smallest projects.
Step 1 - Outline pool on the ground
This is the first step to establishing exactly where the pool will be dug, and seeing it on the ground can be a big help for homeowners who lack visualization skills. Often homeowners will do this themselves early on to verify with a garden hose or kitchen flour exactly how the proposed pool fits into the yard so they can make changes before excavation begins.Step 2 - Excavation
Digging out a swimming pool requires access to the backyard, so be prepared for creative ways of removing fence spans or making gates larger to accommodate digging equipment. Excavation yields a great deal of "spoils", which is the soil removed from the hole, which the pool company will truck off site.Step 3 - Mechanical
At this stage the piping and wiring necessary to operate the pool must be put into place while there is access. This may require additional surface trenching to the pool equipment enclosure or to power and water connections. At this point the heater, filter and other add ons will be installed.Step 4 - Steel
The shell of your pool depends on steel reinforcement bar to be strong enough to hold water and prevent cracking under the expansion and contraction of the surrounding soil. This is a dense network of steel bars that may, in some ways, resemble a basket.Step 5 - Gunite
Gunite is concrete that is sprayed onto the rebar basket and builds up within it until the pool walls reach the proper thickness. This becomes the bond beam which may be over a foot thick. Once gunite is in place the surface of the shell is hand finished.Step 6 - Tile and coping
Waterline tile will be installed around the top edge of the pool shell. It is set relative to the designated water level when the pool is full. This stage may be much simpler if the edge of the pool is a cantilevered extension of the deck instead of individual coping stones which must be set one at a time. If the deck is cantilevered, then the order in which waterline tile is installed will be different, because the deck must be in place prior to setting tile.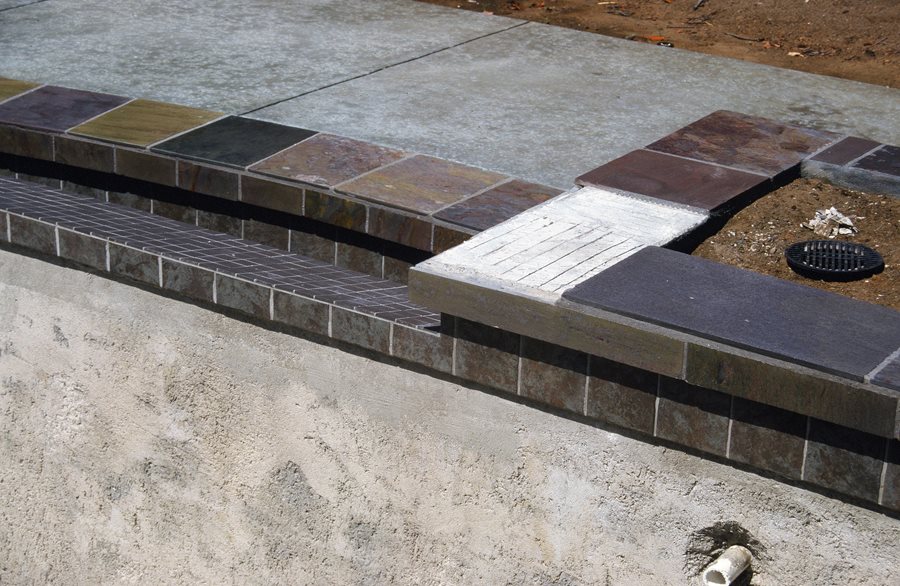 This pool features multicolor slate tile coping and mottled stone-colored ceramic waterline tile.
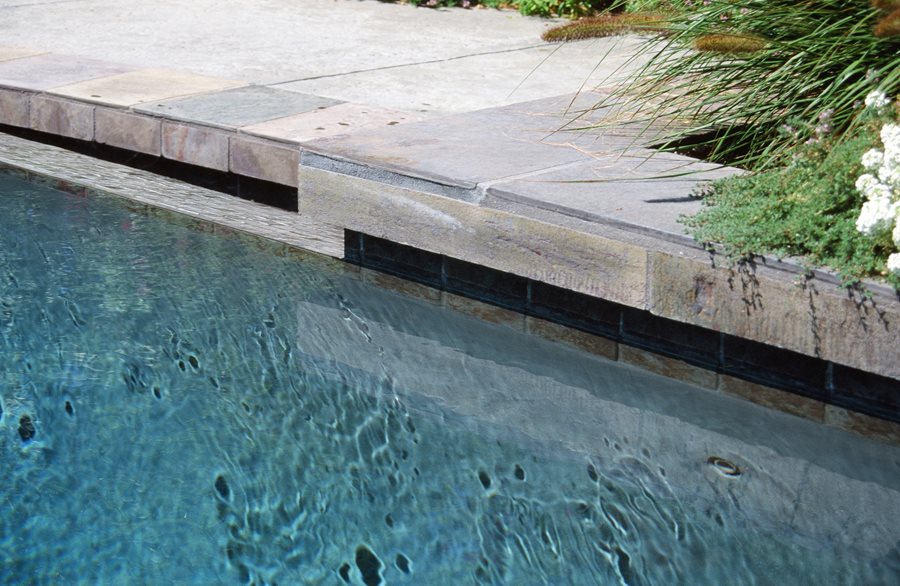 The finished edge of the slate coping pool shows how this waterline tile strategy minimizes its visibility.