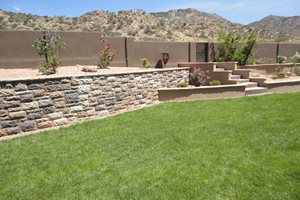
Backyards
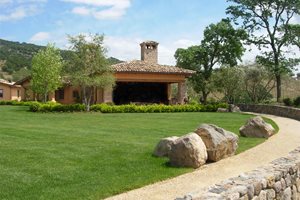
 Front Yards
New Lawn Installation: How to Plant Grass
Learn what to expect during the lawn installation process for sod, seed, or artificial turf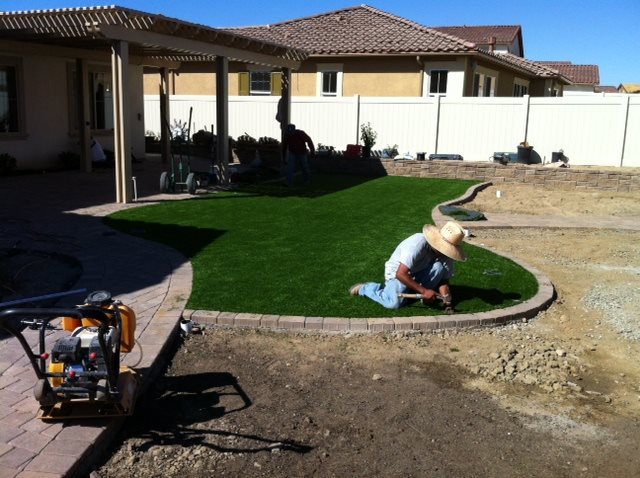
Artificial turf is the most labor-intensive type of lawn to install, but it takes no maintenance once it’s in.
Though installing a lawn seems straightforward, there are number of pitfalls involved in the process which may not be obvious at first glance. Here, lawn care and landscape professionals share their tips for a frustration-free installation.
Which type of lawn is best?
There are a few common options for achieving a lush, green lawn. Sod can be rolled out for an immediate green look, seeding or hydroseeding are inexpensive options which allow you to choose the exact varieties of grass in your lawn, and artificial turf is a maintenance-free alternative that is especially appealing in desert areas.
Sod.
“Sod is the most common option people choose,” says Daniel McClure of LKM Mowing and Landscaping in Normal, IL. “It has instant appeal, the initial maintenance to get it established is much easier, and it has a tight root system so few weeds grow into it,” he says. However, sod can be more susceptible to disease than a seeded lawn, and the initial installation costs more than seeding.
Seed.
A hand-seeded lawn is an easy option for homeowners who want to do it themselves. The advantage to seeding is that you can tailor your seed choices to the soil type, sun, and amount of traffic the lawn will get. The disadvantage is that when you create ideal conditions for lawn seed to sprout, weed seeds will also come up.
Hydroseed.
Hydroseeding is a fast option for seeding large areas of lawn quickly and inexpensively. You’ll need to hire a professional or rent a hydroseeder for this process. McClure points out that one of the advantages to hydroseeding is that the papery mulch used keeps seeds warm, and therefore encourages better germination rates than hand-seeding.
Artificial turf.
Once installed, artificial turf needs no maintenance beyond keeping the surface free of leaves and other debris, so it’s a popular choice in places where there are water shortages. Artificial turf is especially great in tiny spaces that may prove difficult to irrigate or mow, and on putting greens where a consistent surface is of benefit. However, it does heat up in the sun, so may not be ideal for families with pets or small children.
The installation process
While the beginning stages of installing a lawn are similar for seed, hydroseed, sod, and artificial turf, some elements are very different. Below, professionals share the step-by-step processes they use to get a great result for each type of lawn.
Sod installation
Install irrigation.
Since you need to trench in order to add the sprinkler system, it’s important to do that before you lay the sod.
Remove debris.
Remove all stones, roots, and construction debris to obtain a smooth surface to act as a base for your new lawn. Rake your soil so the level is about 2 1/2 inches below the desired final grade.
Install edging.
Whether you’re using brick, steel, concrete, or plastic edging, it’s best to install it prior to putting in the lawn so that you don’t mess up the smooth surface of your soil. The edging also makes it easier to get a consistent grade across the entirety of the lawn.
Add topsoil and compost.
“We add a 2 inch layer of blended topsoil and compost,” says Mark Paine of Sposato Landscape in Milton, DE.
Grading.
Create a finished, smooth soil surface which will act as the base for your lawn. The soil should be about a half inch below the desired final grade.
Apply lime.
Paine suggests adding lime, which gives the soil the more alkaline pH it prefers.
Install the sod.
“It’s a little like installing a hardwood floor,” says Paine. You simply unroll it and fit the pieces together tightly.
Sod rollers are optional.
A sod roller is just a heavy drum that is filled with water and can be pushed, using a handle, across the lawn to help the sod make good contact with the soil. It’s often not necessary. “If you lay the sod down so the roots are making good contact with the soil, there’s no need to use a sod roller,” says Paine.
Use starter fertilizer.
Paine recommends getting your lawn off to a strong start by using a slow release fertilizer such as an 18-24-12, which will give your lawn the nutrients it needs to succeed.
Water.
Depending on how hot it is, you may need to water as much as 20 minutes three times per day for the first two weeks to help your sod get established. “If it gets soggy or if the temperatures fall, you can turn down the irrigation,” says Paine.
Seed installation
Prepare for seed.
To install a seeded lawn, start by adding irrigation, removing debris, installing edging, adding topsoil and compost, grading, and adding lime just as you would for a sod lawn
Spread seed.
Use a broadcast spreader to spread the seed blend over your prepared soil.
Rake the soil.
“A critical component of success is to make sure you have contact between the seed and the soil,” says McClure. “Without good contact, the seeds won’t germinate.” However, be careful not to bury the seed any deeper than 1/8 of an inch.
Topdress with straw.
McClure recommends scattering a light layer of straw on top of your seed. This provides nutrients, keeps the seeds warm enough to germinate, stops the seeds from baking in the hot summer sun, and provides some protection from birds.
Water regularly.
Depending on the weather conditions and soil, you may need to water up to 20 minutes three times per day for the first two months to keep the seeds moist. If the seeds or sprouts dry out even for a short period of time, they will die. This is one of the most challenging aspects of starting a seeded lawn, particularly on slopes or in very hot climates.
Keep off the grass.
Try not to walk on your new lawn for the first two months. After the first month, you can begin mowing, but it still a good idea to keep children, pets, and other regular foot traffic off the lawn until it is thoroughly established.
Hydroseed installation
Prepare for seed.
Begin by following the same steps to prepare the planting area as you would for a seed or a sod installation.
Add hydroseed mixture to the tank.
The hydroseeder has a tank to which you add seeds, the papery mulch, water, and fertilizing agent. The agitator inside the tank mixes the ingredients and keeps any one ingredient from sinking to the bottom.
Spray the seed.
Once your seed mixture is thoroughly mixed, aim the hydroseeder’s hose and spray the seed mixture over your soil surface. Take care not to accidentally spray seeds in your garden beds, although a little bit of overspray is unavoidable during this process. There is no need to rake or mulch a hydroseeded lawn.
Water and keep off the grass.
Follow the instructions above on caring for a seeded lawn. Water regularly and keep foot traffic to a minimum.
Artificial turf installation
Lower the existing grade.
“You’ll need to start by bringing the soil level down to 4 inches below the finished grade,” says Steve Biernacki of WaterQuest, Inc. in Albuquerque, NM.
Install edging.
It’s a lot easier to install edging before installing the lawn.
Fill with road base.
Biernacki recommends using a 4 inch layer of road base, or crushed rock, underneath your artificial turf to allow good drainage and an even surface. Make sure the base rock is tamped down firmly.
Roll out artificial turf.
“Artificial turf comes in roll just like carpet,” says Biernacki. “For large installations, there will be some seams as you roll it out, but you can obscure those just as you do with carpet.”
Connect seams.
If there are any seams on the lawn, join them together using the special tape meant for that purpose. Use the tape along the back side of the artificial turf, and as you’re joining the seams make sure the nap, or blades of artificial grass, are going the same direction.
Secure turf around edges.
“We use 8 inch galvanized nails every 6 inches along the outside,” says Biernacki. It’s important to pull the turf taut when spiking it in.
Add infill.
While infill isn’t necessary on artificial turf, sometimes people choose to topdress their artificial turf with rubber pellets or sand. “It’s just a personal preference whether you choose to use an infill material or not,” says Biernacki. “When you’re standing up and looking down at the lawn, you can’t see much of a difference between using rubber pellets, sand, or no infill.”
Make the nap look natural.
When you unroll artificial turf, the blades of grass, or nap, are laying flat. Biernacki recommends using a gas-powered broom to brush the nap into an upright position.