
How to Build an Outdoor Fireplace
A step-by-step guide to building a fireplace in your backyard

-
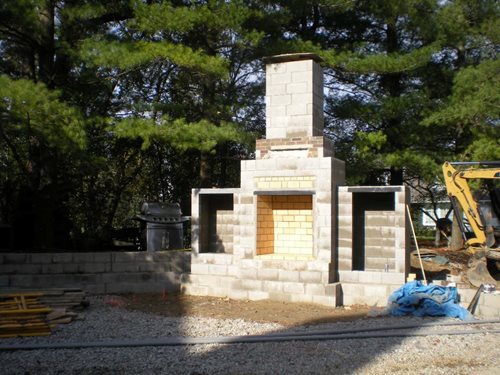
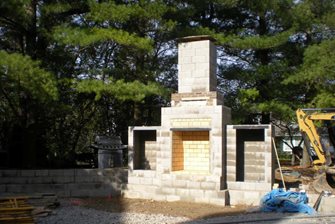 This fireplace, custom built rather than from a kit, is now ready for a decorative veneer.
Thanks to prefabricated kits, it’s much easier to build an outdoor fireplace whether you're a DIY homeowner or a contractor. They bypass the exacting process of laying block to build the firebox and the exacting process of fashioning a chimney around a flue. With kits, you can be sure the unit is perfectly engineered to draw and heat at optimal levels.
This process is straight forward when you consider it in a step by step process. For a fireplace built from scratch, there would be many more steps for the mason to create these same elements from the ground up. However, more and more landscape contractors are using fireplace kits so they can do all construction in house without having to subcontract the masonry.
Build an Outdoor Fireplace Step by Step
- Obtain a building permit.
Before you build a fireplace it is wise to first check the location and height with the local ordinances to be sure it's legal to build in your yard. You'll also need to know setbacks from structures and property lines. The permit requires all of these criteria be met before it is issued. - Find your gas line.
There must be a source of natural gas on the property so you can tie in at the most economically feasible location. The longer the supply line, the more this project will cost. Gas line size varies according to application, and if it is to supply your grill too, make sure it is large enough to keep all your new amenities adequately supplied for maximum heat and efficiency. - Choose a design or kit.
The kit you choose will have specific dimensions that must fit the foundation you'll build in the next step. The kit or its manufacturer may include details on foundation construction as part of the package to make sure they are compatible. - Build the foundation.
There must be a solid concrete foundation beneath your outdoor fireplace so it is well anchored, particularly in regions that experience earthquakes and tornadoes. The foundation sets your finish elevation of the surrounding patio and the level at which the kit will be placed. - Install the kit.
Place and anchor the kit per manufacturer's instructions. - Apply veneer masonry.
This step is highly variable depending on what kind of masonry cladding is planned for the kit. A stucco expert or a stone mason is required to finish the outside of the kit with the materials you've selected. - Connect the gas line.
Gas line should already be in trench waiting to connect to your gas fixtures in the firebox. - Add spark arrestor.
The spark arrestor sits atop the chimney for fireplaces designated for wood only or wood and gas.
|
Contributing Author: Maureen Gilmer, contributing writer for Landscaping Network, author and syndicated columnist |
 Outdoor Fireplaces
 Outdoor Fireplace Cost
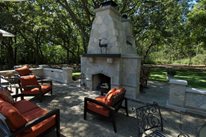 Outdoor Fireplace Size
